Sunday, January 31, 2010

On display


It suddenly dawned on me that I never showed you the ladder I got for my birthday with actual quilts on, did I? I had planned to paint it, but somehow never got round to it. While decorating for Christmas I brought it in, placed it against a bookshelf and started folding and hanging quilts over the rungs, and I must admit I liked the effect. And it has become quite the conversation piece, drawing lots of attention to my quilts. Instead of having quilts draped across the armrests on the sofas or piled in a chair, they are put on display in such a way that people notice them and ask to see them properly. And vain quilter that I am, I must admit that I enjoy that a lot. ;-)
I rotate them, so that there are always at least two on my sofa - something easily accesible to huddle under when the evening gets chilly, you know? - and so the ones hanging get refolded from time to time. The ladder has five rungs, but the lowest one is too close to the floor, so I really get to display four at a time. I'm not sure how good an idea it was to ask for it to be tapered, because the quilt at the top has to be folded a lot more than the rest, so you don't get to see as much of it, but never mind, it works the way I had hoped it would, and that's the main thing, isn't it? The rungs are rough and need a bit of sanding, and I worry about the wood leaving marks on the quilts (I have covered them with towels before hanging the quilts now) so once the weather is a bit warmer, I will get round to that painting or at least a bit of varnish.
I cropped the picture a bit to hide some of the mess here, but I see I should have removed a pile of books from the floor as well. Oh well, we can't all have stylists - this is how it is here, anyway - housework gets done, but not every day... I actually worked to a strict rota of 45 minutes of sewing and 15 minutes of housework during the day yesterday and got quite a bit done. Enough so it doesn't get too embarassing if people arrive unexpectedly...
I finsihed quilting my X-block quilt yesterday and got the binding on. A bit of hand-stitching now and it will be done. And I started a new project - pictures soon ;-)

Tuesday, January 26, 2010

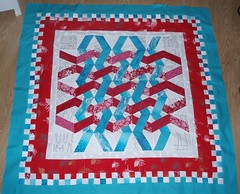
x-block top finished


x-block top finished
Originally uploaded by crafty mathea
I actually managed to get my X-block quilt top finished this weekend. It has been so cold lately that there has been precious little sewing done, but there's nothing like a guild meeting coming up to get me going. It would be nice to have something for show-and-tell! I've found a fun IKEA fabric for the backing, but the red I was planning on for the binding is mysteriously lost, so I'm considering a black and white stripe instead?
Now if only I could come up with a way to quilt it. I must sleep on that, I think...

Friday, January 22, 2010

Experimenting


star
Originally uploaded by crafty mathea
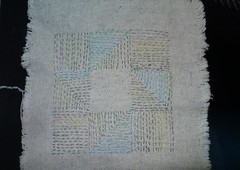
I was so inspired by Jude's what-iffing that I couldn't help having a go. I had a scrap of linen left over from making those little fabric baskets for Christmas and drew a Friendship Star block with water erasable marker. I used a lovely variegated linen thread from Stef Francis for the running stitches. My stitches are nowhere as even as Jude's and it seems that I'm not all that good at stitching parallel lines either, but let's just call that "an organic look" for now, shall we? I quite like my little star, in fact, and I might even find some use for it at a later stage. You never know...

Tuesday, January 19, 2010

Messenger bag, check!


I finally got my act together and finished my sister's bag. Poor love, she has been waiting long enough, and has been extremely patient with me. The thing is, it has been so cold lately that I have been reluctant to venture into my sewing room. But once I did so, the actual construction of the bag was done in a jiffy. The lid and the pocket have been ready for a while, so there really wasn't much left to do. Several urgent texts to my youngest sister to get her to provide measurements, based on the bag I made for her a while back, made me realize that I need to take better notes when I make something from scratch. Now, I never thought I would need to make another one, but that's just it - you never know!

It turned out that eyballing the strap and thinking that the leftover strip was just the right length, turned out to be an unwise decision. I ended up ripping it off and making a longer one than the one you see in the picture so that it can be worn messenger bag style with the strap across the chest.
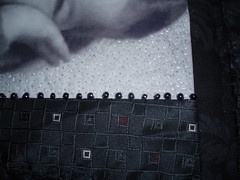
The photo (my sister herself when she was little) was printed on fabric (Jacquard Inkjetprinting cotton) and I added some seed stitches on the bacground, to make the face stand out more. The stitches look shiny like silk in this photo, but are made with DMC cotton floss. A thrifted tie and cushion provided fabric for the strips around the photo and the main body of the bag is made from charcoal linen.
The lining is a Lonni Rossi print and I added what is fast becoming my standard zippered pocket, as mentioned before.
Oh, and did I mention it? Sis loved her new bag :-D Her husband's only comment was: "Now see, that's how long I want your hair to be". Duh.

Sunday, January 17, 2010

A promise of spring?


A promise of spring?
Originally uploaded by crafty mathea
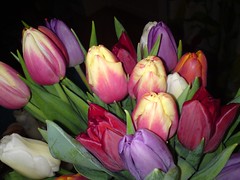
That's what finding tulips in the shops after Christmas is for me. Yes, the snow will go away, the days will be longer and flowers will bloom again.
Winter has seemed incessant this time around with a long period of cold weather and loads of snow. It seams to have hit the whole northern hemisphere at the same time as well, making us all ask: "What global warming?" But apparently those of you in Australia for instance are getting more than enough heat at the moment... Anyway. As I was saying: got some tulips in and I have been enjoying their pristine beauty. I love them at this stage, when the flowers have just begun to open, and they have this kind of waxy sheen to them. The cold weather will last for a while yet, and I know we have both February and March to get though before we can start preparing for Spring, but it's nice to get a little reminder of the changing of the seasons again. Off we go again on our little journey through the seasons, and before we know it, it will be Christmas again...
... which brings me to this:
My latest purchase. Two Honey Buns of the lovely Figgy Pudding line from Moda. Just in time so I can make a little log cabin quilt for Christmas 2010. Best be prepared ;-)

Sunday, January 10, 2010

Mark the day

I treated myself to a pretty day planner, or "Date Book" as it calls itself, for 2010 instead of the standard issue ones we get at work. The idea is to bring a little cheer into every day, no matter how drab. Although I like my job, there's no getting past the fact that there are periods where I'd rather be anywhere than there. Some nice pictures and some food for thought is excactly what is called for at these instances, and this sweet book seems just the ticket. I love the art of Kelly Rae Roberts and have several of her pictures. The book has gotten me a lot of attention at meetings all through this first week as well, and that's not a bad thing in my book ;-) On using it I quickly realized that it needed an accessory, though. This being the first week of the year, finding the right date wasn't too much of a problem, but as the year progresses I could envision a lot of leafing through to find the right place.

So on Friday night I settled in front of the telly with some felt, fabric and floss to make that little accessory - a bookmark. I used some wool felt and added bits and pieces of fabric from that lovely Authentic Jelly Roll. I just pinned bits and pieces of fabric on to the felt and attached them with a running stitch in variegated thread. The wool is thick enough that I could bury my stitches in it without them showing up on the other side, so I could easily stitch one side at a time. I added some decorative stitching on both sides and around the edge with three strands of cotton floss, and added a ribbon to attach it to the book.
So there it is, I think the colours match the book quite well, and the affirmative words from the fabric are in keeping with the style of the book as well, I think. An added bonus is that making this entirely by hand was very restful and enjoyable, so I definitely see more projects of this kind in my future. More pictures here.

Tuesday, January 05, 2010

Same picture, different words...

Yes, it is the same picture as yesterday! I promised to tell you about the rest of the UFOs, didn't I? :-) Well here goes: The left picture in the top row is one of a series of garden stitcheries that I intend to use in a quilt. I have gathered several pastel coloured fabrics and drafted a pattern for it, so I just need to get stitching. Several of the blocks will be appliqué, so with a bit of preparation this could become a great project to carry around in my handbag.
The brown and yellow quilt in the second row is one of a series of calendar quilts I dreamed up years ago. I have made 7 of them so far, and have 5 to go - one for each month. They all have the same block, but with different placement of lights and darks, so you get different effects. I started making these as practice pieces for free motion machine quilting, and have stitched the name of the month and the names of friends and relations with birthdays during that month on each one. My machine quilting could still benefit from some practice, so I really should make an effort to finish the last five tops.
The quilt top on the far right in the middle row is a Disappearing Nine Patch made of blocks I received as a gift. I plan to make it into a reversible quilt by adding a pieced backing.
Then there is the Autumn garden quilt made from Lonni Rossi fabrics. Another finished quilt top there. This one is also going to get a pieced backing, all in turquoise, I think.
In the middle of the bottom row you get a glimpse of my Grandmother's Garden quilt. This is the one I carry around to guild meetings and such these days. I'm working on the leaves and yo-yos for the border vine. I must confess that I'm rather bored with it, so maybe I should speed the work up a bit just to get it done?
The last one is the one I started in a log cabin class at my guild a while ago. I have used a curtain fabric with illuminated letters, surrounded by strips, courthouse step style, making this my Medieval Court House Quilt. This is the one destined for my bed once it is done, but I still have some blocks to make before that goal is reached...
So you see that I have my work cut out for me. And this is just my UFOs - I daren't make any lists of all the quilts I plan to make yet... Never enough time, and all that -but isn't it fun to plot and dream?

Monday, January 04, 2010

UFOs and WIPs

I mentioned earlier that I intend to finsih some of those UFOs, so in the spirit of the new year and new beginnings I decided to take stock of what I have. I've included my two WIPs as well (works in progress) just so they don't get lost in the stampede ;-) Not very likely right now, as I have been working on them a bit every day, but you never know - I might get distracted...

The WIPs are the red, white and turquoise quilt in the middle of the top row (working on the border) and my sister's bag in the middle (shoulder strap left to stitch and attach). The rest represent a lot of different styles and tecniques, and almost all of them have been introduced here earlier.

I'm not sure about the one in the top right hand corner, though. That one was almost forgotten, although I have known about it in the back of my mind forever it seems. It was started ages ago (we're talking early nineties here...) from a block of the month series in Quiltmaker. There are twelve pictures, one representing each month and a chequered frame around each one. It was presented as a series of small quilts, but I decided to make it into one big quilt instead, and decided to let the colours run from red via purple to blue on the squares in the sashing and from light in the middle to dark at the edges. I remember spending ages moving those little squares around on my design wall before I was happy with the placement. Then I organized it all in a ring binder with squares mounted on paper and placed in plastic pockets to make sure I remembered where everything was to go. All very well, but the problem was that the ring binder was very easy to place on a shelf and forget about. It has taken part in three big moves over the years and I have always known where it was, but there have been other projects that have been more tempting along the way and also my taste has changed. The other day I took it out to have a look, and all of a sudden I was inspired to start working on it again. I'm sure a child somewhere might be happy to receive it once it is done, so I'm definitely going to make an effort to finish it.
This post seems to go on and on, so I'll get back to the rest of the UFOs later.

Friday, January 01, 2010

New year, new possibilities

I'm slowly, slowly emerging from a self induced holiday coma, trying to face up to the fact that everyday life is about to resume. I need a major shopping trip tomorrow, as the cupboards are bare. At least when it comes to staples like milk and bread. Luckily there is the weekend to tide us over before we have to plunge into the first work week of the new year.

I have been doing a bit of sewing today, and although I didn't finish the top of my x-block quilt today, I'm well on my way. My sister's bag is almost done as well, just the shoulder strap to stitch and attatch and I'll be done.

I haven't really taken stock of 2009 yet, but I know I made quite a few quilts and quilt-related items. I have lots of ideas for more quilts to make in 2010, but first on my list are some of those UFOs I have lying around. Some of them are more than 10 years old, and although I could justify throwing them out, I have decided what is to become of them. I'll get back to that later.

Finishing UFOs might be like tying up loose ends. But maybe that's not what they are? Let's call them loose beginnings instead! I'm not going to make any rash promises for 2010, but I will make an effort to work with what I have, and to explore new possibilities. My quilting has been a lot about traditional shapes and patterns, and although that's not going to stop, I also want to continue exploring new paths, working more intuitively and less guided by rules. I hope you will follow me on this path.
Happy New Year!

Thursday, December 31, 2009

Pocket tutorial

A pocket for a handbag might be easy enough to make, you say? Yes, I agree, there are numerous ways of making pockets that are quite OK, but I have worked out one that really works for me, and the people I have made bags for are very happy with this design too. The advantage is that you make the pocket on its own, and add it to the bag as you stitch the bag and lining together, the pocket hanging freely inside the bag with easy access to cell phone, keys and whatever you want to keep in the pocket. I was looking for my notes while making a new bag, and that's when I realized that I should have it all in my blog. And if anybody else can find it useful to, why not!

So, here goes:
You need :
three pieces of fabric:

  • A: 3 1/2" x 4",
  • B: 8 x 4" and
  • C: 8 x 24".

  • a 4" zipper,
  • a 3" piece of grosgrain ribbon,
If you want to be able to attatch your bunch of keys, a metal ring or a carabiner hook or similar might be a good idea too.
Seam allowance: I generally use a standard seam allowance, aligning the right edge of the sewing machine foot with the edge of the fabric (that should be about 5/8" I think).

Fold piece A in half lenghtwise and press. Fold the edges towards centre fold, press and fold along centre fold. Stitch a narrow seam along edge of the strip along both sides and cut the stitched strip into 4 tabs. Next, you fold pieces B and C in half. The 8" folded edges will be placed alongside the zipper as shown in the picture above, using the tabs (placed behind the large fabric pieces) to separate the pieces. The tabs at the edges should be placed about 5/8" in from the edges. The ribbon will be stitched onto the back of the fold to strengthen the opening of the cell phone pocket. To do this, begin with the folded C piece, stitch the zipper along the edge, adding one tab at each end, the ribbon on the back and the third tab on the far right. Stitch another seam along the edge about 5/8" from the first, stabilizing the tabs and catching the lower edge of the ribbon on the back. It should look something like this when you're done. Ideally one should use a matching ribbon, but I used what I had and I'm not too bothered, as it wont really show.
Next, attatch piece B along the other edge of the zipper, catching all three tabs. If you want to add a ring or hook for your keys, use the fourth tab now. Thread the ring or hook onto it, fold it in half and pin it to the middle tab, attatching it while you stitch a narrow seam along the edge of piece B.
Now you have all the pieces stitched together, with the zipper attatched and the opening for the cell phone pocket next to it. Now fold the long C piece in half, right sides together, bringing raw edges of pieces B and C together (4 layers) at the top.
Stitch a seam along each side, backstitching at both ends. Trim corners and turn pocket inside out. It's beginning to look like a pocket now, isn't it? Add a seam 5/8" from the zipper seam along the upper edge to close the upper piece, and a seam on each side to make a sturdier edge and to enclose the raw edges on the inside (shown with red lines in photo). Now to make the cell phone pocket, stitch a seam starting at the right edge (1) on top of the lower seam above the cell phone opening and onto the middle tab (2). Keep needle down and turn 90 degrees and stitch a seam down to the bottom of the pocket (3) to separate zippered pocket and cell phone pocket. Keeping needle down, turn pocket 180 degrees and stitch back on same seam about 1 1/2" (4), turn 90 degrees and stitch a seam to the right edge of the pocket (5) to form the bottom of the cell phone pocket. You might want to measure with your own phone where you want this seam to be - you don't want your phone to slip all the way into the pocket so it is difficult to get out, but it should not be too shallow so the phone falls out either.
That's it, your pocket is done and ready to be stitched to the edge of your lining so that the upper edge can be caught in the seam when you stich bag and lining together.

Now this pocket consists of four layers of fabric, making it very sturdy. I like that, and also the fact that I see the front of the fabric inside the pockets. However, you could make the pocket from a fabric like canvas or linen that is sturdy enough in itself, and looks the same on both sides. You would only need to cut pieces B and C at half the length, and just hem the edges you stitch to the zipper.

Wednesday, December 30, 2009

Holiday sewing

I'm waking up from the holiday coma and today I ventured into the sewing room again to get some work done. I finished trimming all my x-blocks for the second quilt and stitched them together in rows. A bit of ironing here and I can stitch the whole thing together - I might actually finish the top this year, but no promises...

I also finished the body of my sister's bag and auditioned some fabrics for the lining. This one won. It will give her something to read on the bus ;-) I'm also going to make a hanging pocket with a zipper and room for a cell phone. I have made a similar one on several bags now and really like them. As I was looking for my notes (which I couldn't find, of course) I thought it might be a good idea to document the different steps and measurements for future use. There might be a tutorial in it, in fact. We'll see. It will have to wait until daylight so I can get some decent photos anyway. It looks like we'll be snowed in tomorrow as well, so the sewing room might actually be the best place to be.
Correction: The mittens mentioned in the previous post are actually Norwegian, and the pattern can be bought here.

Sunday, December 27, 2009

In between time


Enjoying some quiet time after the hustle and bustle of Christmas and before New Years Eve, with family and friends gathered around some lovely meals. I'm going to another party today, but for the rest of the week I expect to get time to venture into the chaos which is my sewing room. I'll start off with some tidying up tomorrow morning, and then I get to sew to my heart's content - looking forward to that!

I got some lovely presents this year. My sister visited Estonia earlier this month and look at these lovely mittens I got! I've heard these described as Latvian mittens earlier, but I expect they share the same tradition in all three Baltic countries. I like the cats on the front, and the fact that their curly tails are repeated in the border, but look at the fish on the thumb - it took me a while to discover that, but I just love it!
The minute I put them on I felt the urge to go outside and have a snowball fight, and this morning we woke up to snow, so now I can ;-)

Saturday, December 19, 2009

Fantastic journey

Fruity surprise


placemat2
Originally uploaded by crafty mathea
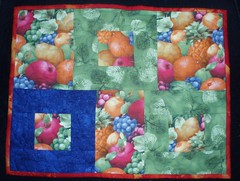
I just finished a couple of placemats for the parents of a childhood friend. They both turned 75 earlier this autumn, and I had no clue until after the fact. I considered sending them flowers, but decided to make these instead, as a pre-Christmas surprise.
The other one has two blue suares and one green, and one is quilted with green thread and the other with blue, so they are different, yet matching. Click on the picture to go to Flickr and see the other one if you like :-)

Sunday, December 13, 2009

Assembly line

It happens every year. "Oh no, I'm taking it easy this year, not making lots of presents - I don't want all that stress during December". And no sooner have the word escaped, I start thinking that it would be nice if I just made a little something for so and so, and while I'm at it, I might as well make some more as that would make a nice present for... - And before you know it I have an assembly line production going.

Well, I don't really mind - it's all part of the hustle and bustle and fun of preparing for Christmas, isn't it? So yesterday I made six of these little fabric baskets, using the tutorial from Pink Penguin.Very nice and easy, and made even easier by the fact that I used only one fabric on the upper pieces and ribbon for handles.
At about 3"x5" they are sweet little things, just right for filling with some homemade goodies, which I have yet to make - I think I'll make some dough for ginger bread cookies today, and some fudge and spicy almonds later in the week, and that will be it, as far as holiday baking is concerned, I think...
Well, I have said that in previous years too, of course. We'll just have to wait and see...

Wednesday, December 09, 2009

I think I'm in love again...

I've been doing a bit of web surfing lately, and I keep coming across all sorts of loveliness which has me reaching for my credit card, but so far I have managed to quell the urge to spend madly...

But have a look at this book by Anne Kyyrö Quinn and that gorgeous cushion on the cover. I'd love to have a go at making one like that, but I keep telling myself sternly that I'd probably give up halfway across - that's an awful lot of felt to cut and stitch, I imagine. I think it might be made like this awesome wreath found via Whip-up. With at least 286 felt circles to cut and fold, this is a project I'll only admire from afar - I know my limitations!
Now I might just be able to stick with this (unless it sticks to me...) lovely model of a Scottish tenement house from Finch & Fouracre found via India Knight via Jane Brocket - wow, I'm amazed that I actually remember the circuitous route that brought me there...

Or maybe I should rather go for this "Tinyment" (love that word!) which comes ready to fold. At 6 cm tall, all that detail is amazing - it's even got it's own little TV aerial!

Not that I haven't had enough to spend money on lately - I've been dragging home bags full of Xmas-pressies every night this week, but at least I'm almost done! I had to give up on finding my sister a new garlic press, though (found her something much nicer, though!) - you'd have thought that such a humble utensil would be available at a reasonable price, but no. All the shops that sell cookery stuff seem to have gone down (or up?) that same superior designer road and expect me to fork out at least £45. For a garlic press? As if.

Sunday, December 06, 2009

Extreme makeover


After a hearty Sunday breakfast inspired by Nigella, (strips of tortilla wraps fried with spring onion and mixed with scrambled eggs, served with baby tomatoes - mmm!) I decided it was time to get my act together and get started on that Christmas sewing. First of all I grabbed that thing that has been weighing on my conscience for a while now - the granny mousie! I keep saying that I wont take on any commissions, and only make what I want to make, and then if somebody wants it after I have finished, we can discuss it. hat sounds great in theory, but sometimes it is almost impossible to say no. A co-worker mentioned that she had this mouse somebody had made for her years ago and she wanted it redressed in more Christmas-like colours. I told her I don't usually do things like that, preferring to quilt, but she said: "I'll take it to work anyway and you can have a look and tell me what you think".

Well, what can you do? Before I knew it I had agreed to make a new outfit for mousie, and despite assurances that there was no rush, I have been thinking about it ever since. So today was the day. Better get this out of the way before I start what I really want to do. I haven't really bought much holiday fabric in recent years, apart from some with snowman motifs, and they weren't really appropriate for this. But eventually I managed to find some pieces among my scraps that were just about big enough. I spent the better part of the morning constructing, testing and resewing, but eventually I got it right.

I changed the style of the apron - no ruffles this time, just a simple lined piece with rounded cutouts on the sides to accommodate the arms. And that's where the title comes in - the arms were originally stitched on to the apron, but it made more sense to me to attach them to the body itself and adjust the clothes accordingly. And if moving the arms to a new position doesn't constitute an extreme makeover, I don't know what does! So there Granny Mouse is in her new Christmas finery. Let's hope my co-worker likes it!
No for some dinner, and then I'll get started on some place mats. Better stitch while the iron is hot, so to speak ;-)

Monday, November 30, 2009

x-blocks

I have a new batch of X-blocks on the go. Same colours as in the previous one, but different setting. I don't know what took me so long, because once I got started this was done in no time at all. But there you have it, I seem to be procrastinating big time lately. It might be that the holiday season arrived so suddenly (so what else is new...) that I feel the urge to put the brakes on. As if my silent protest would help at all - no, I might as well embrace the season and get going on those Christmas projects. Hm, maybe I need to make a list first. That usually helps...

Don't listen to my grumbling - I don't mean it really, I love the holiday season, although I could do without the snow - or slush, which is what it has become today. Now I just need to sit down and decide what to make, bake and buy for the holidays, so I can get started...

Saturday, November 28, 2009

Pre-Christmas inspiration

Look what as in the parcel I picked up from the post office yesterday: hours of browsing fun and inspiration! So what if the first snowflakes are floating through the air? They still melt before they hit the ground and I don't actually need to go outside. So I'll spend some time stitching and a lot of time browsing through my new mags gathering ideas for things to make.

The world might turn white during the day, and I might just be tempted to venture out to place my first footprints in pristine snow once it does, but not just yet - I have important reading and planning to do :-D

Friday, November 27, 2009

Anybody home?

Yes, still here. And thankful that the weekend has arrived. Busy, busy, busy. And there has been very little sewing going on. I'm hoping that tomorrow will improve matters, though. I have started on some new x-blocks, for another red and turquoise quilt and I'm having a friend over for some cutting and stitching lessons tomorrow. The plan is to make a holiday table runner. We'll see how that goes... She has been very interested and made one quilt under my guidance a few years back. Now she feels ready to attempt her next one, but claims to have forgotten everything, so we'll see if I can manage to teach and inspire her to continue down this quilted path I seem to follow. Or maybe we should call it a slippery slope of fabric and notion purchases... - I won't mention that during her first lesson though ;-)

Thursday, November 19, 2009

Seed stitches on photo

Still working on the bag. There will be a bit of handstitching - seed stitches on the backround of the photo, beading around the edge and some decorative embroidery along the seams.
I'm enjoying a bit of quiet time stitching by hand before I start on the main job, which is constructing the bag itself.

Sunday, November 15, 2009

Sneak peek

I've been working on my sister's messenger bag today. This is just a glimpse of the flap with a photo of her as a little girl transferred to fabric. I have stitched angled strips of fabrics around it, log cabin style, finishing with charcoal linen, which is what the rest of the bag will be made from. Next it needs a bit of hand stitching - some embroidery and some beads - before I construct the rest of the bag. I never thought that I would be making another one, but luckily I jotted down some measurements and a rough sketch in my notebook for the previous one*, so I should be able to remember how I did it.
I'm enjoying a quiet Sunday at home, sewing, reading and watching films. It feels really good to slow down a bit after yet another hectic week at work. There doesn't seem to be much energy left for evenings during the week at the moment, but things should improve in about a fortnight. I do have some pretty quilting fabrics waiting in the wins, and if I can just concentrate for a while, I might be able to remember what I was going to make from them as well...

*I can't believe I never posted a picure of the finished bag! Here it is now!

Saturday, November 14, 2009

Blog hopping

I have spent most of my morning here hopping from one blog to another, following the Cross Country Christmas Designer Blog Hop started by Gudrun. There are 12 quilt designers sharing stories about their Christmas traditions and memories, and a free project every day. I only found out about this yesterday, and they are half way through, but there is lots of fun stuff to read and some pretty good projects to get inspired by too. I feel myself getting into that good old Christmas spirit, and have also stocked up on some nice holiday magazines. So I guess this weekend will be all about planning holiday projects - what to make and buy for everybody and to get started on all those lists: shopping, baking, parties... oh, what fun! I think I like this part of Christmas the most - all that anticipation and figuring out what to get for everybody that they'll really love - luckily we aren't that large a family, so the strain on the credit cards doesn't get too heavy. And I tend to go in for lots of handmade anyway, which means that most of my spending has been done in advance (read: fabric stash!).

The illustration is yet another of those "Listen, Honey..." designs from Twisted Thread, see the links in the sidebar.

Tuesday, November 10, 2009

Red and white

I thought I'd show some of the things I have made from that red and white fabric, over the years, and have managed to unearth some, not very good photos. The items in question have long since gone to new homes, so these photos will have to do for now. These Christmas hearts were made some years back when I came across a bag with lots of little cross-stitched christmassy motifs I had stitched when I was a young girl. I added some fabric, cut out heart shapes and stuffed them, making them into Christmas ornaments for someone's tree. It might not be entirely clear from this picture that this is a fabric cone filled with sweets. It has an angel's head and wings attached to one side, making it look as if the angel is offering an armful of sweets to you. I made some of these for friends, and had planned on making some for myself as well, but as these things go, I never got around to it. This Christmas, however...

These angels in their nighties are ready for bed. The pattern for these, and the angels above came from one of Tone Finnanger's books, one which has been put to good use here over the years. I think I might have made about half the little people and creatures she presents in this book, so it is one I can really recommend. Hm, I suddenly got the urge to sew something - must go and have a look at that book...

Sunday, November 08, 2009

Preparing for Christmas

I have been rather quiet lately, mulling over what will be my next project, rifling through my fabric and notions, but not getting anything done. It might just have been that quiet moment before the storm sets in, though - it suddenly dawned on me that it is Christmas in just over a month, and if I am to make any presents I really need to get started! Some recently added fabric might give me the push I need, though.
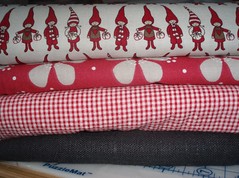
Now, what to make... I'm thinking of making some storage bags/buckets from the first two. The red and white seersucker is one fabric I keep coming back to, so I keep buying more. It has been used for christmas ornaments, angel clothing, and all sorts of christmassy things over the years, and I'm thinking of making some candy cones from them, decorated with some pretty ribbon or something. The charcoal linen/cotton blend at the bottom of the pile is the only one I have very specific plans for - it is destined to become a messenger bag for my middle sister. She has requested one similar to the one I made for my youngest sister a while back. She didn't seem all that interested at the time, but after seeing all the use it has been getting, she has come to the conclusion that she "needs" one too. It's nice to know that my efforts will be appreciated, so I'm more than happy to make one for her. I'd better get my act togehter and get started !